I wrote this page several years ago, when I was trying to put a laser printer onto WiFi. I thought I'd found a cheap solution. It was cheap but it didn't work very well. If you get one (don't pay more than a dollar!) then these instructions may still work. I bought an Airport Express, learned not to turn it on and off (it burns out), and was happy ever after. Until I got a WiFi-enabled printer and the problem went away for good.
How to configure the TP-Link Pocket-sized Wireless Print Server on Mac OS X (and Linux, perhaps)
This device seems to work (at least it's working for me!). It's cheapish and it does support WPA. I've only had it half a day (2009/01/11) so I don't know about durability.
But the manual is badly translated from the Chinese, and was probably written by the person who designed it, so it doesn't tell you what you need to do, let alone how to do it. So I post my solution, and I welcome suggestions on how to do it better -- contact me here.
In what follows I presume you have AirPort and OS X. If you haven't you will be a Linux geek and well able to cope, I'm sure.
- If you can't even load the little CD into your laptop, the manual's available online: at time of writing it is at http://www.tp-link.com/english/soft/200881110943.zip, but in extremis try www.tp-link.com and search for tl-wps510u.
- At time of writing there are no firmware downloads to worry about.
- Attach the little thing to your printer as per the manual:
- turn printer off;
- attach print server (probably using the connector lead supplied) without power;
- turn printer on;
- attach power to print server;
- wait about 40 seconds
The wait is because it does a power-on self test (POST), which takes that long.
- You should now see a red light and a little green light labelled 'wireless'. If you don't, I suppose you could try a factory reset (manual appendix A). You probably have to know how to do that anyway in case something goes wrong:
- remove power from print server;
- press and hold down the reset button (it's next to the power inlet, and it's inset -- I use a biro);
- still holding down the reset button, connect the power (yup, that's the tricky bit!);
- hold the button down for 15 seconds or longer;
- let go and wait 40 seconds as above.
Got those lights now? Good.
- In your AirPort menu you'll find a new section, underneath the list of WiFi networks that you can see, headed Devices and containing the entry WLAN-PS. That's your print server: select it.
- Now get a browser window and type 192.168.0.10 into the address bar. You will be asked to login: what that looks like is browser-dependent, so I can't show it. Your name is admin and your password is 0000 (four zeros). These are the factory defaults.
- First you will see a picture like this.
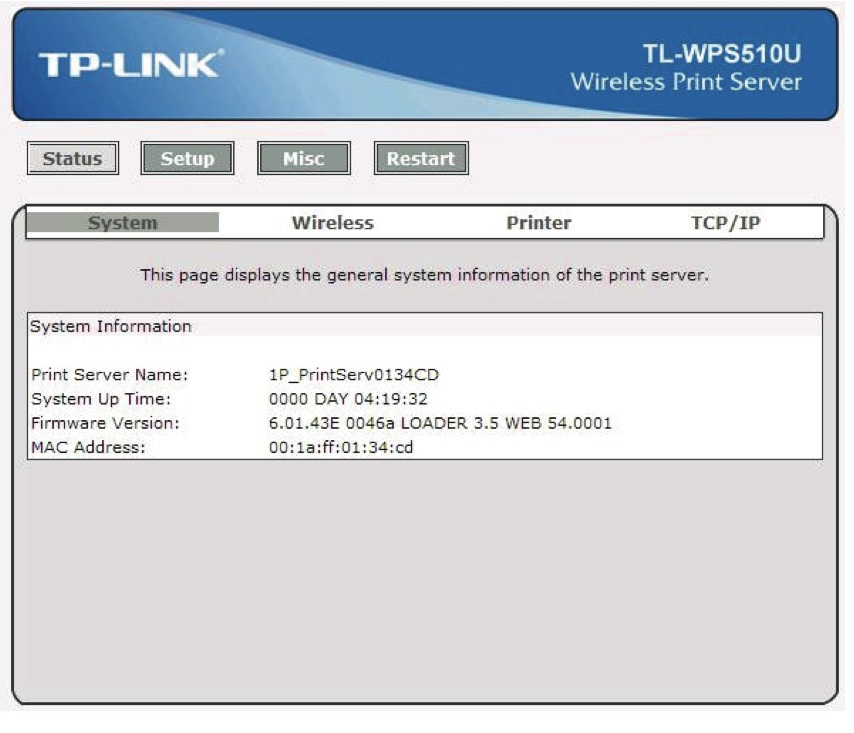
The print server name is unique -- it uses the last three digits of the MAC address -- but you probably want to change it, in the next step.
- You definitely want to change your password, for reasons which will later become clear.
- Click Setup;
- change the print server name if you like;
- change the password;
- in both places;
- and click Save & Restart.
Confusing things now happen. You should be invited immediately to login again -- do so, still as admin but with your new password. There will be a longish pause and you should be back to the entry screen again. If you get bored or lost you can type 196.168.0.10 into the address bar again.
- You should still be connected to WLAN-PS, but now you have a device that only you can login to. Good. Next you will change its TCP/IP address.
- Click Setup;
- click TCP/IP.
You will see a window which looks like this:
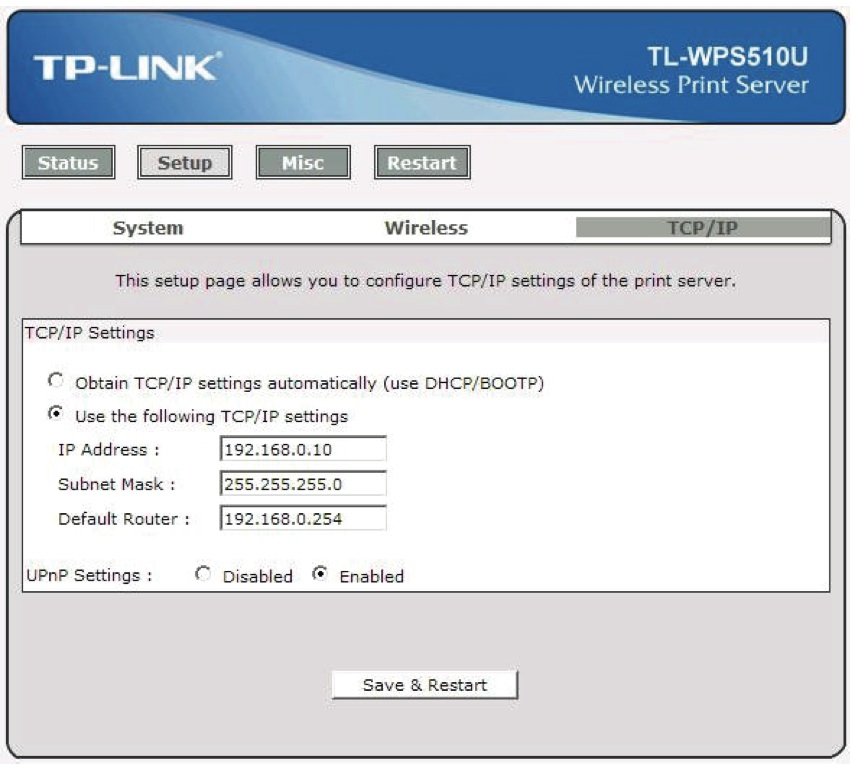
The manual says that a fixed IP address is recommended, and I think it's right. (DHCP doesn't work for me: I think it guesses the DHCP server, and gets it wrong. Or something.) Pick an address that your router will recognise and your DHCP server won't allocate. If you don't know what that means, get help or look here.
Put the print server address that you guessed into 'IP address'; put the router address (look here if you don't know what it is) in 'Default Router'. I disabled UPnP, because I have no idea what use it is under Mac OS X.
-
Write down that address that you guessed, and press Save & Restart. This time it won't automatically connect, because the address has changed. Type the new address into the browser's address bar, press return, and wait (that POST 40-second delay is happening again). You should be still communicating with WLAN-PS, and eventually it will wake up and talk to you. When it does, login (user admin, new password as above).
-
Almost there: you have a device with its own address and its own password. It remains to make it talk to your AirPort or whatever is giving you WiFi access. Click Setup; click Wireless. You should see a screen like this one:
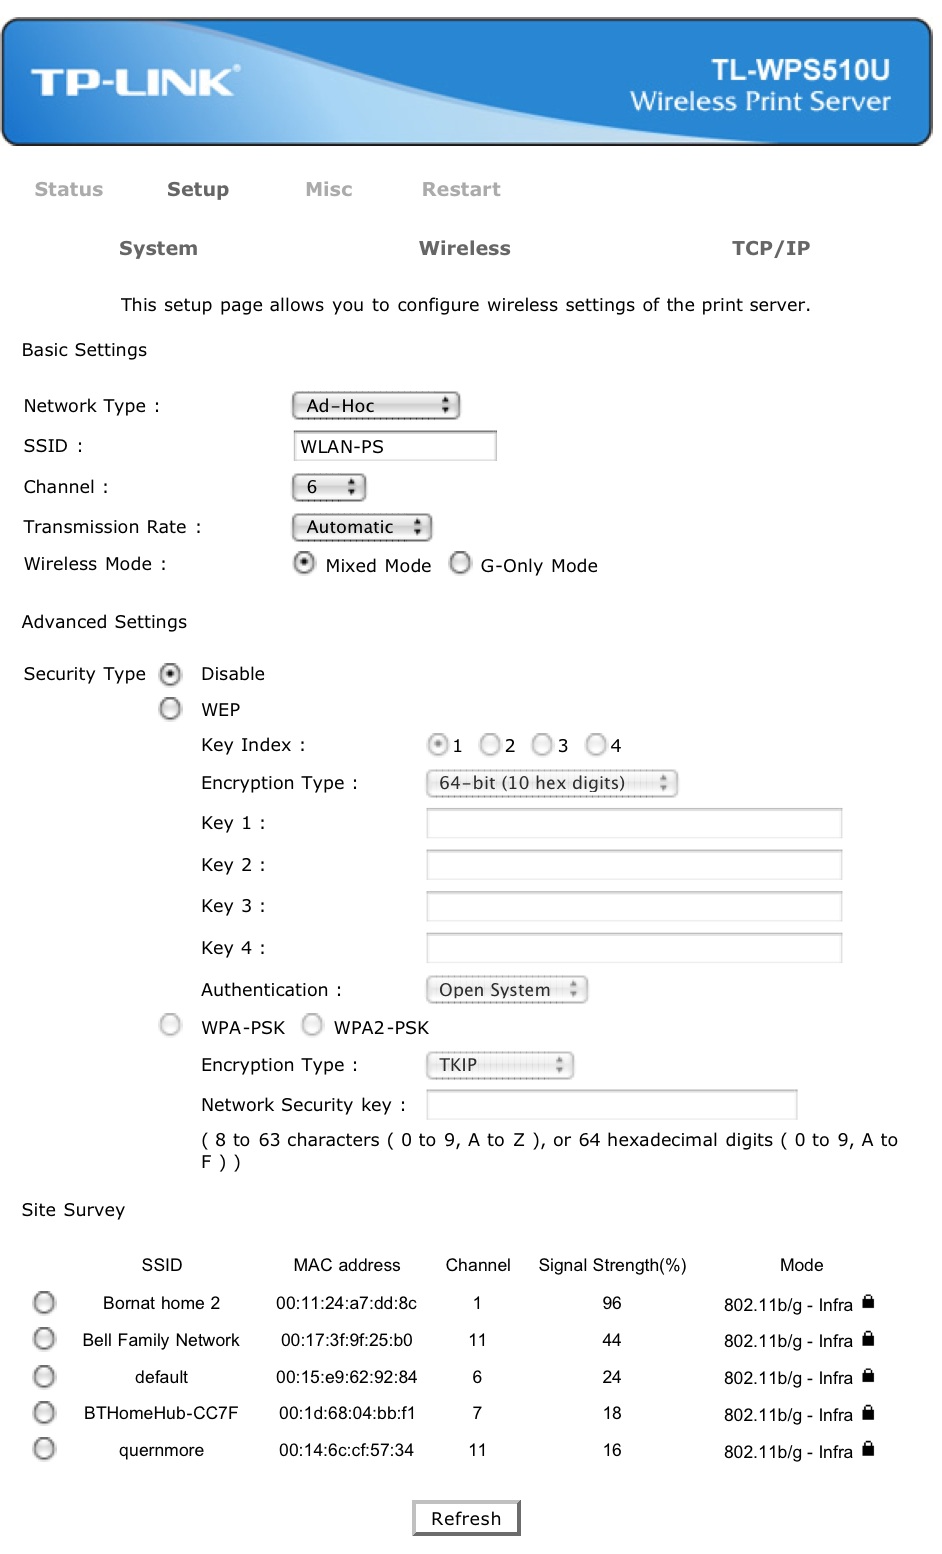
The important part is at the bottom, under 'Site Survey'. Your wireless access point should be there, unless you made a closed network -- if you did, unclose it for a while, and come back to this point when it's open.
- Click the radio button next to the name of your wireless access point -- the network name you see in your AirPort menu. It will magically appear in the SSID box at the top of the page, and you will be able to select an authentication scheme and give a password (if you don't know what scheme you are using, have a look with AirPort Utility first).
- Now click Save & Restart (bottom of the window, not shown on the picture above for silly technical reasons). Your connection with the server will vanish, WLAN-PS will no longer be in the AirPort menu, and you have to reconnect with your normal network. But if you've done it right, the print server will be on that network too, and you can connect to it again with that address you guessed.
- Now, at last, you can connect as per manual page 37 -- make an IP printer and use LPD. I don't know about Jet Direct, but it probably works. Don't know if Bonjour gets through the print server (but I'd like to know if anybody wants to tell me).
All this was a great pain. I wish I knew how to make an installation wizard like the one they provide for Windows. I wish I knew why DHCP doesn't work.
Richard Bornat 2009/01/11
mail me if you learn anything.